
The production of each ink vignette began with choosing the images from Hollister Inc.’s collection of historic photographs that paired best with the section of script for that animation. We were lucky to partner with History Factory on this one because their research team had curated lots of useable material to choose from.
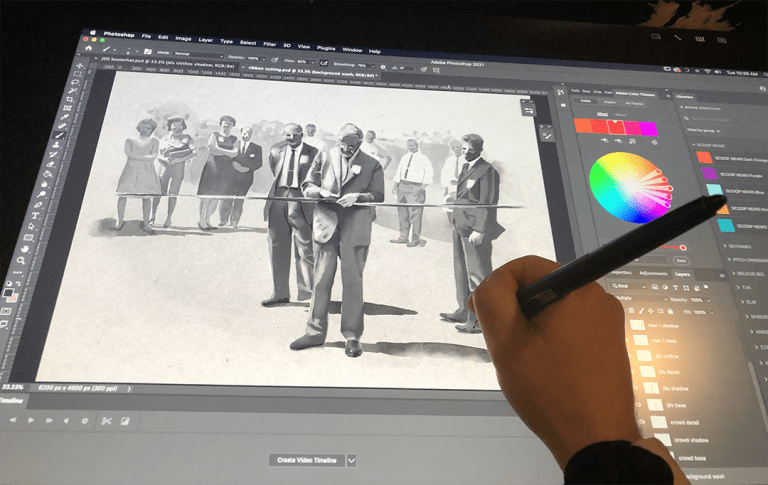
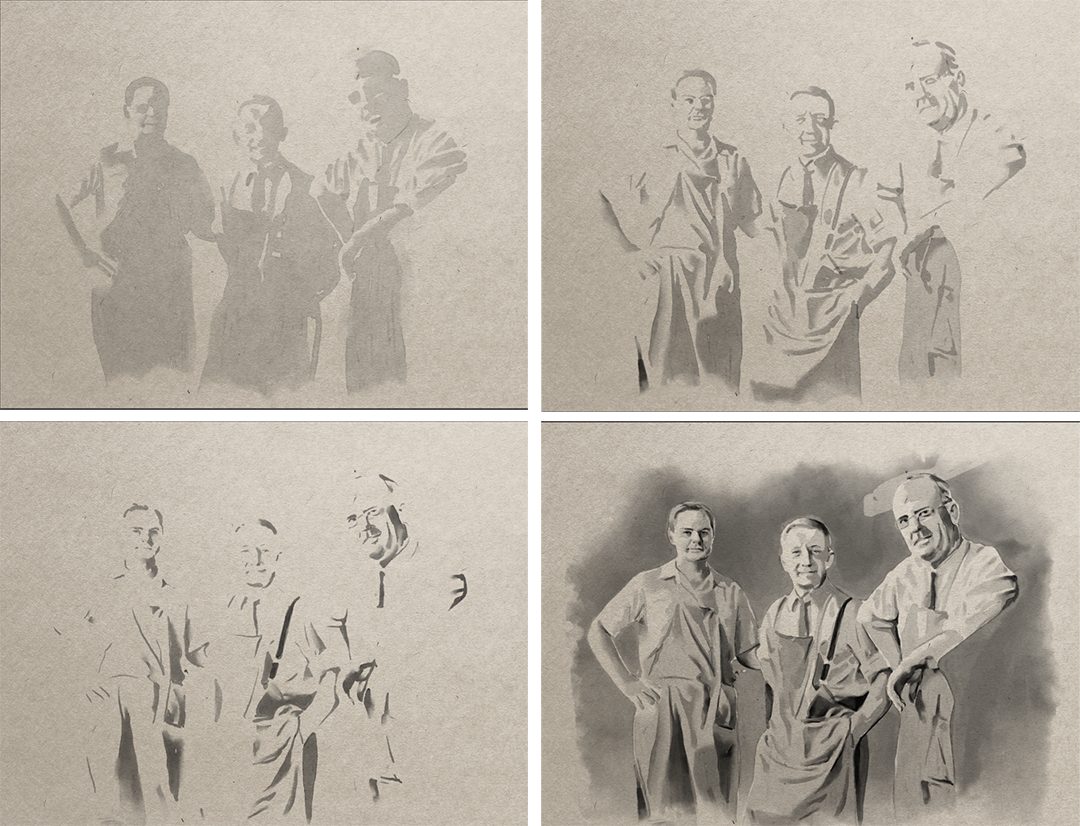
Once we had our selection, the next step was to recreate those existing photographs as digital illustrations in Adobe Photoshop. This was an exciting part of the process because I got to experiment with a lot of different paper textures and specialty illustration brushes in Photoshop. The goal was to make ink, a very physical medium, look realistic in a digitally illustrated format – using brushes that blend well with natural paper textures turned out to be a large part of this.
The support of exploration and experimentation throughout the project was key.
Ezra Pailer, Visual Effects Artist / Early Light Media
Once the drawings were finished, I brought them into After Effects, where the next step was to build the “ink reveal” bleed animations. This was one of the more challenging parts of the workflow – it took a lot of experimentation to figure out how to create the most convincing result for the ink effect while also keeping the process time-efficient. Part of this was observing the way real ink behaves and considering which animation tools could get us closest to the real thing.
The technique we ultimately used was to create “bleed masks”, which are growing ink blots generated in After Effects that function as a “stencil” on top of the illustration layers, creating the illusion that they are gradually appearing or vanishing. Each Photoshop file was separated into multiple layers of ink detail, which would bleed on with an offset to create a more organic feeling to the effect.
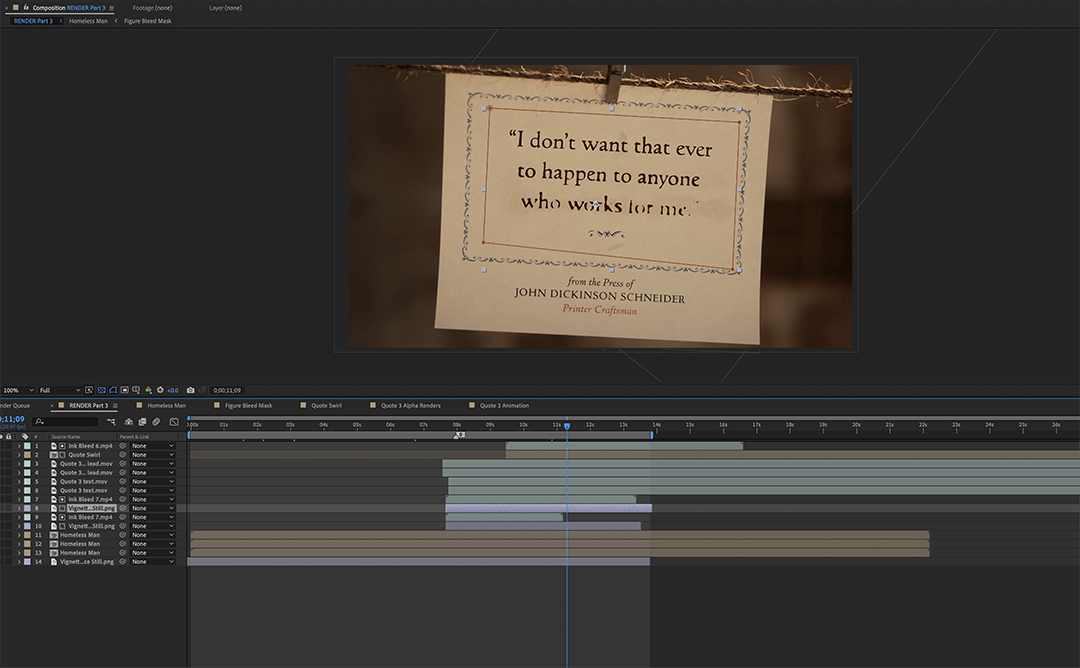
After an ink bleed animation was built, the final step was to composite and track it to the blank paper base in the live-action footage. This phase posed some interesting challenges of its own because the compositing techniques had to be adapted to the subtle lighting and texture variance between scenes.
For example, the natural texture of the paper showed up very well through the ink composite in close-up shots, but in wider shots, the paper wasn’t always close enough to retain its texture detail. In this case, we relied on a custom solution to work in paper texture for that scene.
Working on the visual effects team for this project was an exciting opportunity to combine both familiar and unfamiliar animation techniques into one unique process, and I learned a lot while doing so. The support of exploration and experimentation throughout the project was key.
Here’s the film to watch the finished effects.


