
By: Darren Durlach
Lighting can make or break a documentary interview. It’s one thing to set up a camera and hit record — it’s another to shape a space so it feels natural, cinematic, and emotionally resonant.
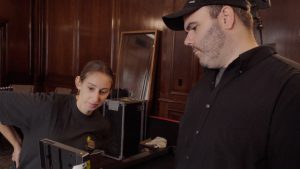
Recently, our team was in Detroit filming a set of top-secret interviews. While we can’t show the actual client or subject, we captured the behind-the-scenes process of building our lighting setup. It’s a great example of how principles — not just gear — can transform a space.
Our Director of Photography, Jonathan Mount, and local gaffer Mila Puccini led the charge. What started as a beautiful hotel suite with big windows and polished wood walls turned into a polished cinematic frame ready for a world-class interview. Here’s how we did it — and how you can apply the same ideas on any budget.
Step 1: Prioritize Depth
 One of the biggest mistakes in interview lighting is placing your subject flat against a wall. It instantly makes the shot look cramped and lifeless.
Instead, pull your subject away from the background. This separation creates depth and keeps the focus on the person. Shooting into a corner of a room can also naturally add depth and texture to the frame.
Step 2: Choose a Background That Isn’t Distracting
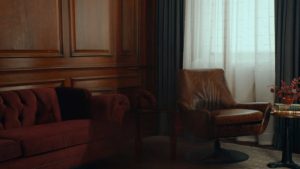
A great background should feel intentional, not accidental. Remove clutter, awkward furniture, or anything that pulls atten
tion away from your subject.
In Detroit, the room already had a strong look, but we still moved chairs and tables around until the composition felt balanced and clean. Little adjustments can make a big difference.
Step 3: Mimic the Natural Light Source
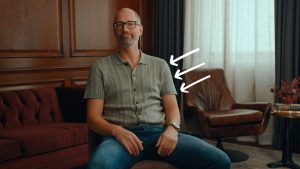
The best lighting feels invisible. As a rule, let the windows tell you where to place your lights.
If you put your key light on the same side as the windows, the audience subconsciously accepts it as “natural.” Put it on the opposite side, and something will feel off. In some cases, we’ll even place a light directly outside a window to mimic sunlight.
For this shoot, we were on the 4th floor with great natural light — so we worked with the windows rather than against them. We also draped them in white unbleached muslin to soften the daylight. That gave us a motivated glow for hair light without letting the windows overpower the frame.
Step 4: Use Book Lighting for Softness
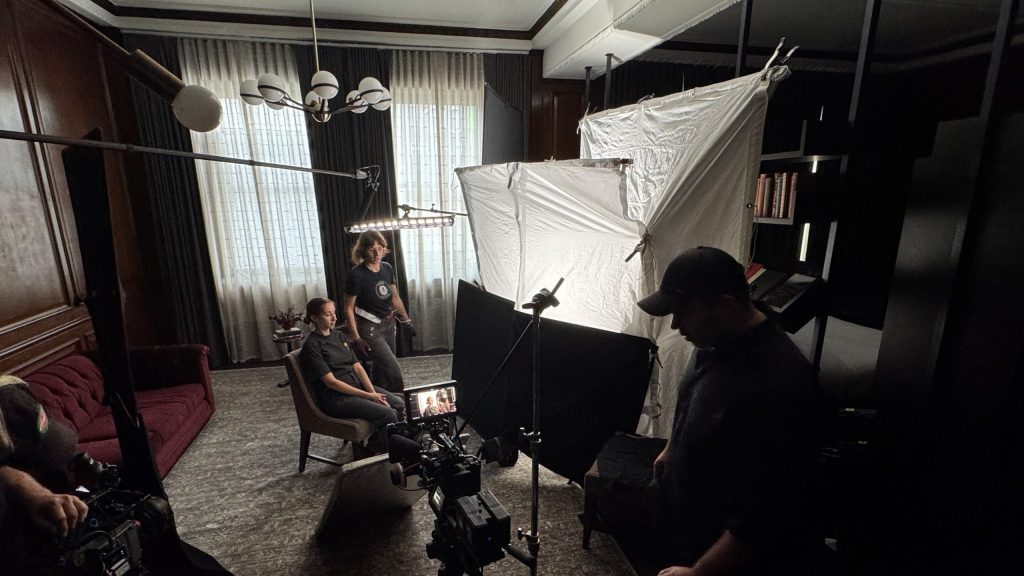
If you’ve got a strong enough light, try book lighting.
Here’s how it works:
-
Aim your light into a bounce surface.
-
Let that reflected light pass through a layer of diffusion.
The result is double-softened light — creamy, natural, and flattering on skin tones. It’s called “book lighting” because the setup looks like an open book.
Step 5: Add Contrast for Shape
Flat lighting makes faces look lifeless. To fix this, Jonathan and Mila used black flags (negative fill) on the opposite side of the subject. By absorbing light, they created a little extra shadow — giving the subject’s face more shape and depth.
Step 6: Separate the Subject with Hair Light
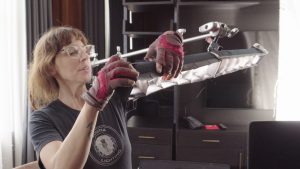
A subtle hair light helps pull the subject off the background. Mila rigged a small soft source to add just enough glow to separate without lookingartificial.
Step 7: Shoot from the Shadow Side
Finally, think about camera placement. Position your camera on the opposite side of the key light — what’s called shooting from the shadow side.
This creates natural contours and dimension on your subject’s face. Put the camera on the same side as the key, and you’ll end up with a flat, uninteresting look.
The Final Frame
Once everything was dialed in, I sat in as a stand-in before the interviewee arrived. The result: a polished, dimensional, cinematic frame — all inside a hotel suite.
That’s the power of understanding lighting principles.
Key Takeaway
You don’t need the biggest crew or the most expensive gear to make interviews look cinematic. What you need is to simply:
-
Create depth
-
Control your background
-
Motivate your light sources
-
Soften and shape your key
-
Add contrast and separation
Master these, and you can walk into almost any location and make it sing on camera.
Want More?
If you’re a DP or director who also conducts the interviews, check out our guide on The Art of the Interview — because lighting is only half the battle.
And if you want more behind-the-scenes breakdowns like this, subscribe to our YouTube channel for regular tutorials and field notes from real shoots.


